Powered By Blogger

Sunday 29 May 2011

It's Mediterranean sunburn time

It's fast approaching the time of year when the sun's rays are becoming much stronger across the Mediterranean and when we see unsuspecting tourists walking around with the evidence of too much exposure. In June. in Cyprus, temperatures continue to rise but do not reach their highest until July and August. In June, by the afternoon temperatures average around 28-31 centigrade and inland up to 34. 


Regardless of your skin type, you should avoid long periods in the sun, as the risk of getting skin cancer increases depending on your level of exposure. 


When your skin is exposed to sunlight, it produces a pigment called melanin to help protect itself against ultraviolet light (UV). This is what makes your skin go darker or what is called a suntan. 

A sunburn is a burn to your skin tissue from overexposure to UV radiation from the sun’s rays. With too much exposure to UV light, your skin overheats and becomes red and painful and may later peel or blister. Redness is classed as first degree burn. Redness and blistering are evidence of a second degree burn. And in some severe cases of sunburn the sun’s radiation can cause third degree burns, which can cause long term skin damage and scarring.

We lived in Australia for a period and "Slip, Slop, Slap" was a popular advertising campaign which aimed to educate the public about skin cancer and prevention, slip on a shirt; put on sun cream and slap on a hat. It educated us as it always serves as a convenient reminder before we go outside.


If you do get a sunburn, you can turn to several simple home remedies to help in soothing the discomfort and help your skin heal faster. Firstly, keep your body well-hydrated by drinking plenty of water and iced herbal teas. Also remember that overexposure to the sun will dry out your skin, so after treating your burn with the recipes below, re-hydrate your skin with a generous application of rich cream or natural oil such as sunflower or almond oil.

The following are home made sunburn soothers which you might want to try.  Plain yoghurt, tomato juice, aloe vera gel, chamomile tea or vinegar (half a tablespoon of vinegar diluted in half a cup of water).

Use a clean cotton cloth to apply any one of the above ingredients directly to your skin; or add one of these soothers to a tepid bath.


If you yoghurt rinse your skin after 20-25 minutes, as the yoghurt will turn sour.


                                   Enjoy the sun but remember - slip, slop, slap.

How to transplant plants


How to transplant plants


Transplanting simply means moving a rooted plant from one place to another. If you prick out tiny tomato seedlings from a propagating tray into individual pots, you’re transplanting.  If you decide to move ta large established rosemary from one position in the garden to another you are transplanting.

If you start seeds in propagation trays transplant the seedlings when they are still very young. Watch for the emergence of the first pair of true leaves and transplant the seedlings soon after this. The choice of planting containers ranges from peat type pots, to plastic cell packs and plastic or clay pots. Peat type pots are useful because the pots can be transplanted with the plant which means the roots are not disturbed, but try to avoid peat because of the unsustainable nature of the peat industry. Plastic and clay containers are much greener as they are reusable.
Before you start, collect the items you need for transplanting and put down a layer of newspaper to catch the compost for re-use.


Follow these steps: 


Fill the containers with potting mix. The depth of the soil depends on seedling size, fill your container nearly to the top for small seedlings but start with about 2.5cm of soil for large ones, since you fill the rest of the pot as you transplant.


Pour warm water onto the soil and let it soak through the soil. Moist potting soil prevents seedling roots from drying out.

Carefully dig out either individual seedlings or small groups of seedlings. A toothpick makes a good tool for digging, lifting, and moving tiny plants. A teaspoon or narrow trowel works well for larger transplants.
Hold each seedling by the leaves and not by the stem, as you may damage the tender stem or damage the plants growing tip.
For very young seedlings, poke small holes into the soil mix with a pencil. For larger seedlings, hold the plant in the pot while you fill in around the roots with soil. Firm the soil gently with your fingertips.
After transplanting keep your seedlings in a darkish area for a day or two to allow the seedlings to recover from the move. If seedlings wilt from the stress of transplanting, lightly spray with water and cover loosely with a plastic bag for a day or two. Return your plants to lighter conditions after the seedlings are established and gradually introduce to sunlight.
Keep the soil moist but not soggy by pouring water into the tray holding the containers and feed regularly with a weak solution of water-soluble organic fertiliser.
As the plants grow, pinch out or snip off any extra seedlings, leaving only the strongest plant to grow on
If you miscalculated your planting out dates or if the weather turns bad, you may need to transplant your plants again to larger containers so they won’t stop growing and become stunted. Roots pushing through drainage holes are a clue that it’s time to move the plants on again.


Toughen your plants for outdoor growing conditions by gradually hardening off. Two weeks before outdoor transplanting, stop feeding and slow down on watering. About a week before you plan to plant out the seedlings, put them outdoors in a protected area, out of direct sun and wind. Leave them outdoors for a few hours at first, then more, then a morning, until they out all day in a sunnier position and out at night.  
Transplant your plants on a cloudy day or in early evening to avoid the sun’s heat and give the plants some time to recover. Water the plants before you start. Dig a hole slightly wider but to the same depth as the pot and add some fertiliser to the hole. Some plants, such as tomatoes, benefit from being planted deeper, so more roots form along the stem.


If your transplants are in plastic or clay pots, turn the pots upside down and slide out the plants or tap the pot with your trowel to dislodge. Plants in peat type or home made paper pots can be planted with their pots, as the roots will emerge into the soil very quickly.

Gently place the plant in the hole, and spread out roots of plants that are not in pots. Slit the sides of peat type pots to open them up for better root penetration after planting. Fill the hole and tamp with your hands, forming a shallow basin to collect water. Slowly pour plenty of water at the base of the transplant. Keep transplants watered well until they become established and start showing new growth.

Thursday 26 May 2011

Growing herbs - how to plan a herb garden

A herb garden will provide you with fresh herbs for culinary or medicinal purposes all year round. But if you do not want, or do not have sufficient space, for a herb garden you can grow herbs in containers or in existing vegetable or flower beds.

If you have sufficient space, here are some ideas on how to create a  practical herb garden. Start with a sunny but sheltered spot which is preferably near the kitchen, so that when cooking you can easily pick herbs to use fresh out of the garden. 

Many herbs originate from the Mediterranean area and will do well in rocky, relatively dry soil, remember that they evolved in conditions of good drainage. This means that they do need some water, but the soil should be moist not wet. So while soil preparation is minimal it is not non-existent, a mix of sandy loam and clay or a good compost will support a good range of herbs, but it must be well drained.

Designing yourself a herb garden is a simple task. Start by measuring the space available and making different plans of assorted shapes until you have a few good ideas to work with. Simple forms such as square, triangles, circles or half-circles are a great way to begin a structure to plant your herbs. The design options are entirely up to you, draw a plan of the space available and get designing but take into consideration the number of herbs and relative size of the herbs you want to grow and their accessibility. You might also want to incorporate paths which can be paved with bricks, stones or even old wood to make access easier and add some charm to your herb bed.

Obviously the choice of herbs depends on your personal tastes, whether you want them for cooking, cosmetics, fragrance or medicinal purposes, but these are our favourites (in no particular order): 

Annuals - parsley, coriander, basil, aniseed, rocket and summer purslane.

Perennials - bay, rosemary, mint, sage, oregano, thyme, lavender, chamomile, chives and fennel

For detailed advice on how to grow and care for the herbs of your choice go to http://sites.google.com/site/cyprusgardener/home/herbs

If the herbs you want to grow are annual and you want to grow a large quantity to harvest and dry at the end of the season then you can make additional plantings anywhere in the garden. In fact, these can be incorporated into your vegetable beds, as herbs such as basil, coriander and dill, will attract beneficial insects which can help with pest control.

Culinary herbs, that are perennial, might not take as much space since you cut only what you need and a few plants should be enough to see you through the season and can be placed in a more permanent bed. Use the space you have available to grow the herbs you find most useful. Another consideration is if you are growing certain herbs for pot pourri or dyes, you will need a much larger space. 

It's important to plan the distribution of you herbs from the beginning. When growing, various herbs will take different forms. Some herbs grows thick but short in height while others are long and lean. Certain herbs have the tendency to grow and crawl about and can even behave like vines. This unstructured mixture can seem totally out of control especially during their peak season of May through June. 

Wednesday 25 May 2011

French Beans - are really South American

The French beans, both dwarf and climbers, sown in early March are now producing lots of beans. French beans are also known as snap or string beans and were originally native to South America. Apparently, their name derives from the fact that the Huguenot's who fled France in the 1690's starting cultivating the bean in England around this period. French beans are eaten along with their pods before the seed begins to bulge. Once the seed has matured and the pod has dried out the beans are called haricots.

French beans need a light but rich soil. Prepare your vegetable bed in the autumn by digging a trench and adding well rotted compost or manure and like all legumes add lime if the soil is too acid, aiming for a pH of 6.5 to 7.0.  Growing French Beans in the same spot as last year is to be avoided to avoid diseases, so plan ahead and use a rotation cycle for your vegetable beds.

In the spring fork over the vegetable bed in preparation for growing your French beans, breaking it down to a fine tilth. By early March the soil should be warm enough to start planting beans. To sow your French beans make a groove or drill in your prepared bean bed, 5cm deep for climbers and 2.5cm deep for dwarf beans and plant the beans 15cm apart in the drills. Ensure rows are 30cm apart for climbers and 45cm apart for dwarf beans. 

French beans like lots of water so make sure you don't let them dry out, as regular watering will ensure a longer cropping period. Hoe to keep down the weeds when seedlings are small and mulch with straw to keep down weeds and keep the soil moist. 

Support your French bean plants with short twiggy branches or pea sticks to prevent them falling over or being beaten down by heavy rain or strong winds. Use poles or plastic netting for climbing varieties.

Aphids love French Beans, indeed all green bean plants, so keep an eye out for them. A serious infestation will badly stunt plant growth. Check over the leaves and stems of your vegetables, especially the tender growing tips and gently squash any colonies you find. When watering your plants with a hose try knocking the aphids off with the spray, as this can be effective. And if all else fails spray with water to which a ecologically safe washing-up liquid has been added.


Begin harvesting your French beans from mid-May onwards. Pick when they are about 10cm long, the picked pods should snap easily when bent. Pick often so none of the green bean pods mature. This will ensure cropping for 5 to 7 weeks of this delicious vegetable. You can generally expect 3-6Kg from a 3 metre row.


Take care when removing the beans from the stalk not to loosen the plant at the roots, instead use scissors or secateurs to cut the beans off the stem. 

If you want dried beans, leave some pods on 1-2 plants and let them dry thoroughly. Hang the plants somewhere to finish drying indoors until the pod dry's enough to remove the beans. Lay the beans out to dry and when ready store them in an air-tight jar. Beans are also ideal for freezing.

French beans are very low in calories, contain no saturated fat and are a very good source of vitamins, minerals and plant derived micro-nutrients. They are very rich source of dietary fibre. French beans contain excellent levels of vitamins A, B1,B6,C, antioxidants and beta carotene. They also contain good amounts of minerals like iron, calcium, magnesium, manganese and potassium which are very essential for body metabolism.

To use your freshly picked French beans wash thoroughly in water. Top and tail them, leave whole or cut into desired lengths. Beans can be cooked whole, cut crosswise or diagonally. If you want sweet tasting, crisp fresh beans, cut them as little as possible but cut older more mature beans.


The beans can be enjoyed raw in salads, boiled or steamed. Stir-frying preserves the best qualities of the fresh bean. Whatever cooking method you choose, remember to cook beans as little as possible using the smallest amount of water as possible.

Make a delicious salad, which can be enjoyed hot or cold, after steaming allow the French beans to cool and add chopped spring onions, tomatoes, red pepper and mix in olive oil, wine vinegar and salt and pepper to taste.

Grow your own for a better taste and it's so much safer.

Saturday 21 May 2011

Beetroot - not just for Christmas

Beetroot is an easy vegetable to grow from seed  and can be sown, in Cyprus, between September and April.  It's more or less disease and pest free and only needs moderate watering.  We are now working our way through a lovely row of big plump beetroot and it's such a versatile vegetable. Until recently, we have been using supermarket bought beetroot and the difference in taste is remarkable, home grown is much sweeter, deeper in colour and cooks quicker. Did you know, that the green leafy portion of the beet is also edible. It is most commonly served boiled or steamed, in which case it has a taste and texture similar to spinach. 


When most people think of beetroot, they think of sliced or chunked beetroot in jars at Christmas and because of this it's sadly an under used vegetable. Besides being enjoyed grated raw or cooked in salads, it can be used for chutney, pickled, in dips, juiced, for soups, baked and even in desserts (try a beetroot and chocolate cake). Winemakers have also been known to use it and apparently its tastes like port.  


Beetroot, botanically-known as Beta vulgaris, evolved from wild seabeet, and was first domesticated in the eastern Mediterranean and Middle East – although it was only the leaves that were eaten at that time. In early times, the medicinal properties of the root were more important than its eating qualities and it was used to treat a range of ailments including fevers, constipation, wounds and various skin problems.  The ancient users were right, studies have shown, beetroot can lower blood pressure, boost your immune system and is a rich source of potent antioxidants and nutrients, including magnesium, sodium, potassium and vitamin C.


We all know that beetroot stains everything it touches, tastes good and is very healthy addition to a diet. But here, in no particular order, are some things that you may or may not have know about beetroot.


Eating a lot of beetroot turns your urine pink/red and can even make your stools darken.


Beetroot juice can be used to measure acidity. When added to an acidic solution it turns pink, but when it is added to an alkali it turns yellow.


Beetroot is used in the food industry to colour a number of things such as to make the red redder in tomato pastes, various sauces, jams, and even ice cream.

Thursday 19 May 2011

You cannot beat the taste of home grown tomatoes

You will absolutely delight in the taste of tomatoes you have grown yourself.  Tomatoes with taste,  rather than those supermarket  tomatoes which can be so bland.
Try slicing a home grown organic tomato and a supermarket one and then look at the difference. Supermarket ones are usually so mushy that the only thing they are good for is pasta sauce.  And even that will not taste as good as it does when you make it with home grown tomatoes.
Everybody who has grown their own home grown tomatoes can verify that they taste so much better. However apart from the taste, home grown tomatoes are simply better for you and better for the environment.
If you enjoy a real, sweet juicy tomato, then, you may be surprised to discover how easy it is to grow your own.  Even with limited space, you can grow tomatoes in containers. You can start them from seed in January, in a propagator or indoors somewhere warm, or buy ready grown plants from a garden centre.  And you can never grow enough, as any surplus can be made into a delicious sauce by cooking down and adding onion. garlic and basil and once completely cooled frozen in batches for later use.
But back to those supermarket sold tomatoes which are picked whilst still green.  Picking before full ripeness  gives  both the grower and the processor enough time to ship them to the supermarket.  However before they are transported,  they are usually sprayed with the chemical ethylene (derived from oil) to finish ripening them whilst in transit,  as they might spend days from picking to being sold.
So when they arrive at your supermarket, they have been artificially ripened with a chemical and they are watery because they have been picked too early.  Added to this,  many tomatoes are grown hydroponically and have never had their roots in soil.  When you purchase tomatoes and cut them open, they are  typically pale on the inside and the flesh is very mushy.  That’s because all that the added chemical did was make them look ripe on the outside.  And that is why they do not have any taste. They’re not ripe!

Without wanting them,  you  get the chemical that ripened your tomatoes, plus the chemical they fertilized it with and the chemical pesticides they used while they were growing them.
But if you slice open home grown tomatoes, which were allowed to completely ripen on the vine, you see that they’re firm on the inside and full of lots of colour and flavour. And the more colour you have in all of your vegetables the more vitamins and nutrients they contain.
A recent study reported that a home grown vegetable had 84 minerals and elements whilst the same exact vegetable planted from the same seeds  but grown conventionally with the standard chemical fertilizers and pesticides had 8-10.
Once you have had a home grown organic tomato you will never want to buy those supermarket ones again.  

Wednesday 18 May 2011

How to avoid back pain when gardening.

Gardening can be a strain on the back with bending, twisting and lifting leading to possible injuries. Why do we not treat gardening like any other physical exercise where we, if we follow the advice, generally warm up before starting and cool down afterwards. Starting exercise with stiff muscles is not clever and by warming up problems like I encountered this morning could have been avoided. Warming up does what it says, by increasing the temperature of the muscles the probability of over stretching is reduced. 

Other tips to follow and avoid back pain are:

(1) Avoid stooping when planting or weeding - being on your knees, using a kneeler, is a better body position.

(2) If you have lots of planting to do, stand up every 20 minutes and stretch your back.

(3) Avoid lifting heavy weights, use a wheelbarrow whenever possible but don't overload it.

(4) Always bend your knees to lift, hold the object close to the body whilst tightening your stomach muscles and keep you back straight.

(5) Try not to stay in one position too long. If you have been kneeling to weed for a period then ensure your next job is standing. 

(6) Pace yourself, especially when digging, have lots of breaks and don't try and do it all in one day.

Sunday 15 May 2011

10 Reasons to Grow your own food

If you have started to Grow Your Own or already do so, here are our top reasons why we like growing our own food!

1. Growing Your Own saves you money by cutting your food costs. It's amazing the amount of vegetables that can be grown from a packet of seeds.  And you can further reduce your costs by saving seeds to replant the next year, foraging and swapping surplus fruit, vegetables and herbs with family or friends. 


2. Growing Your Own reduces your carbon footprint.. Food grown at home does not have to travel anywhere. Compare this to food that is flown in from all around the planet and driven round the country in lorries. Also supermarket vegetables and herbs come wrapped in plastic packaging which go to landfill sites.

3. By Growing Your Own you can avoid the nasty chemicals in pesticides and fungicides used when growing our food. You know exactly what goes into the food you grow. The bottom line is that pesticides and fungicides are poisons designed to kill living organisms which can also harm humans. If you can, be organic as possible and if using chemicals try to use natural ones.

4. Growing Your Own is very relaxing and good physical exercise. There’s nothing nicer or more relaxing than spending a couple of hours tending to your plants. Garden work brings those stress levels right down and the exercise you get from digging, bending, lifting and moving will burn off lots of calories.

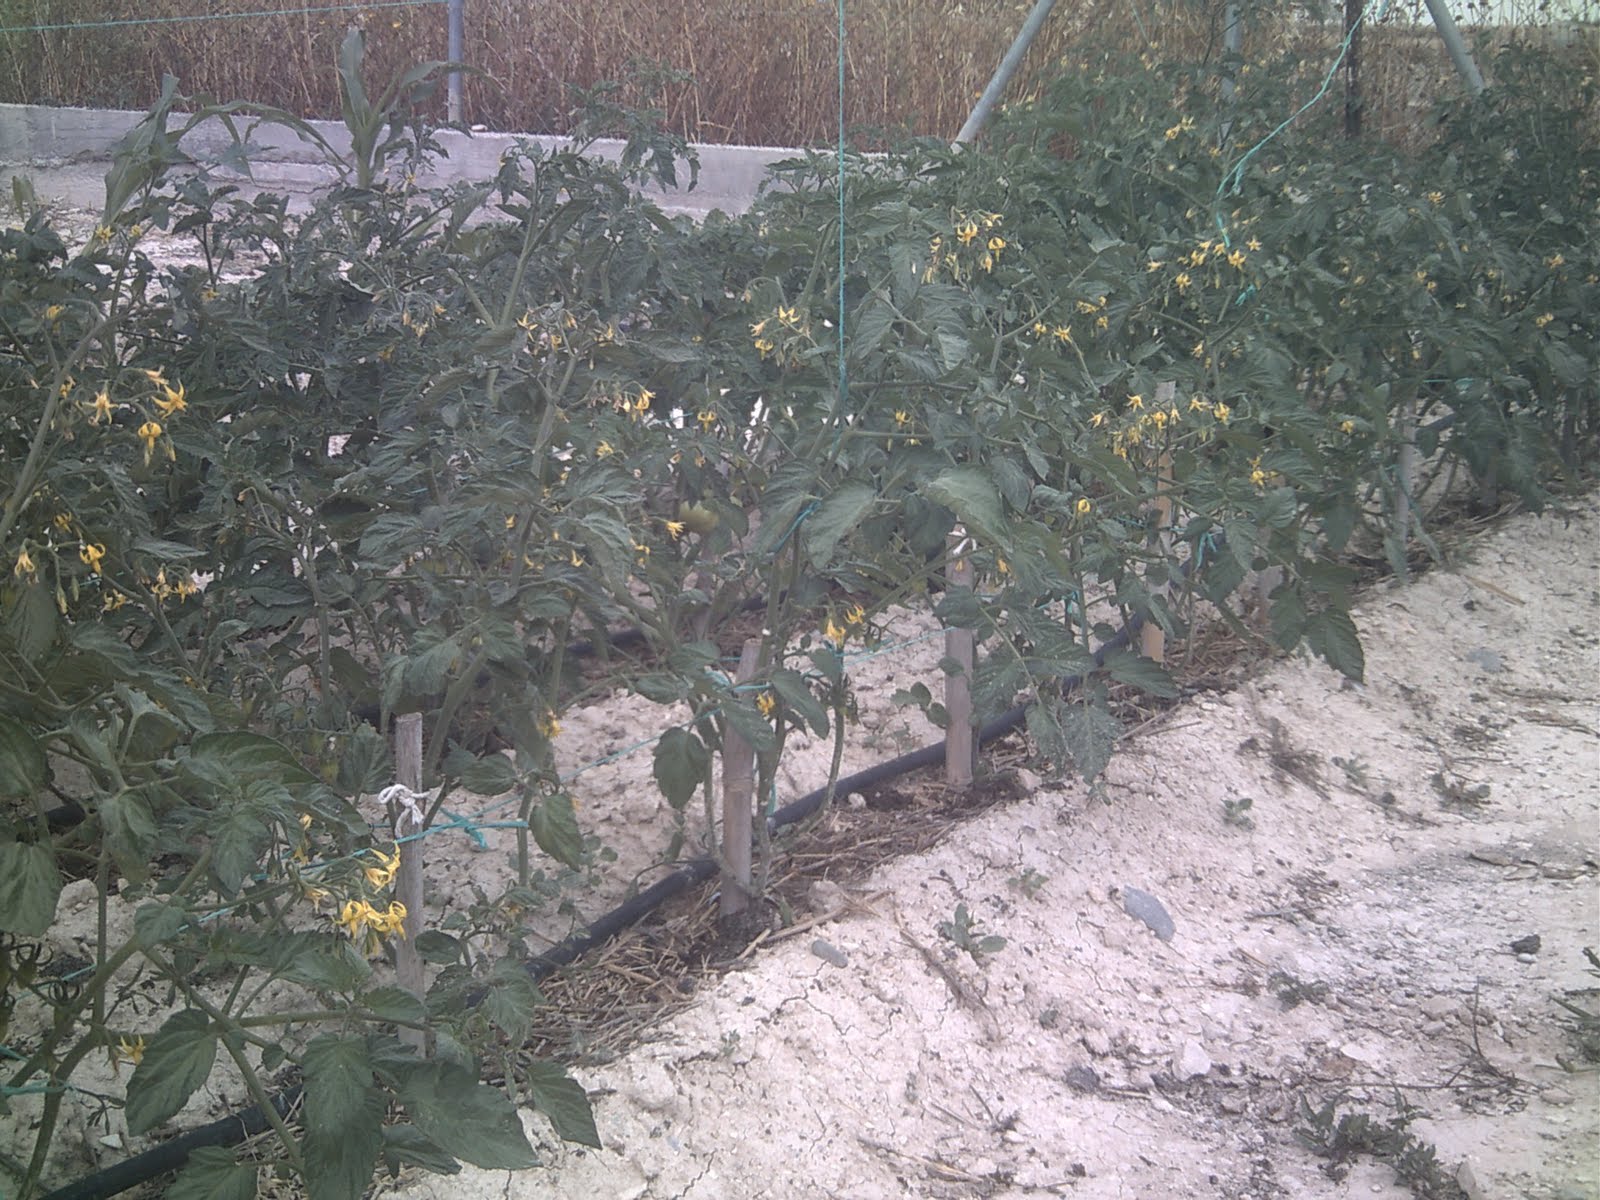
5. Growing Your Own allows you to taste new produce. For example, there are around 7500 different varieties of tomatoes available, compare this to the few varieties on a supermarket stand.  If you grow your own there’s no need to stick to the same old varieties,  you can grow all kinds of exotic crops and unusual vegetables. You can even help revive forgotten native species by growing them yourself, or grow your own favourite foreign crops without the usual air miles.Growing Your Own also inspires you to cook more and discover new recipes to use.

6.  Growing Your Own is a brilliant lesson for children.  Getting them involved shows them the food on the plate does not just come from a supermarket shelf and that actually it’s from the ground and we need to look after the land.  

7. Growing Your Own will help keep you healthy. Freshly picked organic vegetables are packed full of nutrients.  Transfer vegetables straight from the garden to kitchen to plate and you benefit from all those freshly picked healthy vitamins. Vegetables start losing nutrients as soon as they’re picked, so by growing your own you avoid the long, vitamin sapping journey of some supermarket bought produce.

8. Growing Your Own means you can share your home grown crop with friends, family and work 
colleagues.

9. Growing Your Own saves energy, farms have changed drastically few generations, from family-based small businesses dependent on human energy to large-scale factory farms. Modern farming uses more oil than any other single industry. Oil is used to drive farm machinery, produce synthetic fertilizers and to transport  produce around the planet.

10. Growing Your Own promotes biodiversity. Mono-cropping is the practice of planting large plots of land with the same crop year after year. While this approach expanded farm production, the lack of natural diversity of plant life has left the soil lacking in natural minerals and nutrients. To replace the nutrients, chemical fertilizers are used and often in ever increasing amounts. Single crops are also much more susceptible to pests, making farmers more reliant on pesticides and some insects have become genetically resistant to certain pesticides and stronger pesticides have become necessary.

If you can add to this list please let me know.

Wednesday 11 May 2011

Nutritional Medicine - Artichoke Tea

I have always been interested in food as medicine (nutritional medicine) which is an ancient concept and recently many traditional remedies such as chicken soup to treat colds or garlic to ward off illness have been shown by scientific study to have some validity.

We put in a line of purple globe artichokes (a perennial thistle) last November by dividing side-shoots, from well established plants, obtained from a relative in the village. We didn't expect them to do very well in their first year but they have grown to a good size, producing a good crop of globes. 
The edible part is fleshy base, known as the "heart" and the mass of the artichoke called the "choke" is inedible. After finding out how to prepare the globes (amazing what you can find on you tube) we have been looking for recipes to use them.


Whilst researching for recipes I found out that artichokes were a medicinal food with health benefits. Apparently in Vietnam a traditional tea is made by boiling halved artichokes hearts which is excellent for maintaining good liver function and said it promotes clear skin.

So we tried it and rather than a bitter brew, we were surprised it had a mildly sweet and pleasant taste. In fact, it tasted exactly like an artichoke heart.

Scientific studies have been conducted into artichoke tea have revealed that it contains anti-oxidants, may reduce cholesterol and improve both HDL/LDL ratios and may improve digestion by promoting bile production. The tea is also rich in folate, vitamins A, B1 and C, and minerals such as magnesium, phosphorus, calcium, iron, potassium and zinc. The tea is also a diuretic, helping rid the body of excess water.


So trial and error over countless generations is now being shown by scientific research to be correct. Perhaps we should pay more attention to the ancient remedies rather than expect modern medicine to have all the answers.

Saturday 7 May 2011

Make your own Rosewater

May is the traditional month in Cyprus for picking rose petals for the production of rosewater. Rosa Damascena, a pinkish rose, is the native variety and with it's very strong fragrance is ideal for making rosewater but any variety of rose can be used.


Rosewater is widely used in Cyprus for desserts baklava, mahalebi and loukoum (Turkish Delight), adding a sweet smell and lovely fragrance. Adding rosewater also has health benefits, as it has antibacterial and antiseptic properties and is rich in vitamins A, C, D, E and B3. 


Traditionally rosewater is made by distillation and special stills are used, allowing the petals to be boiled and the steam to condense through an attached tube into the still. However, it can also be by using the following method. 


Pick six cups of rose petals, which is sufficient to make about 250g of rosewater, early in the morning, shake to dislodge any insects, remove the petals from the flower and wash carefully. Place the rose petals in a pan and just cover with water. Bring to the boil and simmer for forty-five minutes. Allow the rosewater to cool completely, strain and squeeze out any remaining liquid from the petals, before storing in a glass bottle. Keep the rosewater in the fridge and it will keep for up to a year. 

Thursday 5 May 2011

Wood Burning Stove

We are approaching our second winter in Cyprus and our main source of heating for the living room and kitchen is a wood burning stove which we used for about 6-8 weeks last winter. The heat generated was remarkable. We even boiled a kettle every evening for a hot drink.


We bought a wood stove for a number of reasons. Living rurally there is lots of wood to collect locally, especially when the olive trees are being trimmed, and this is a sustainable heat source.  We have also been busy collecting wood which has resulted from the Council knocking down some of the derelict houses in the village and we have managed to get home, using our wheelbarrow, some really large roof beams. Collecting wood becomes an obsession and whenever we go for a walk we return with some wood. We probably have enough wood for the few next winters. 


Using a wood burning stove, and probably most importantly, is largely carbon neutral, as growing trees takes in carbon dioxide which is then released when the wood rots or is burnt.
Cleaning the stove daily is a bit of a chore but it soon becomes part of your daily routine, as is reloading it with paper and kindling ready for lighting. The ash generated is not wasted as it is useful in the garden. It comprises of about 10% potash, 1% phosphate and has traces of iron, copper and zinc but the largest component is at 25% calcium carbonate which is a common liming material. Adding ash to acidic soil, like ours, is of great benefit and raises it alkalinity.
Stove technology has really moved on and modern stoves burn very efficiency and our model burns at 72% efficiency. Modern stoves get the most out of your fuel by burning the smoke. To achieve this efficiency and best smokeless performance go for a stove with a turbo baffle or similar mechanism which creates a process called tertiary burning. The baffle directs the smoke through the fire again and again, creating an internal circular gas flow that continually mixes the exhaust gases with fresh oxygen. This mix is drawn through the base of the fire allowing the gases to reach temperatures that would not normally be reached, and then they re-burn further adding to the heat of the stove. You get remarkable bright blue, green, red and orange flames as this process occurs which is better than watching TV on most nights and very relaxing.
We purchased a Horse Flame HF-717 Elessar cast iron stove with a glass front which produces 18.5kW or 63,000 BTU and weighs 196kg. It's a large unit but it means we can use quite large logs with no problem. The suppliers installed it and it took four men to remove it from the trailer van and move it to it's location. We had the flue pipe outlet installed high up on the wall directly into the chimney breast which means two metres of piping are in the room but this provides added heat as the pipe gets very hot. 


The stove we bought, although efficient, gets through a lot of wood and a constant supply is required. When you have to cut and chop this amount you really know about it and it warms you up on a cold winters day. We needed about three full wheel barrows of wood a week to run the stove. Sawing this much wood by hand was hard work and some of the larger logs were too difficult so I purchased  a small petrol chainsaw. Spent all day today using the chainsaw to cut the large logs we have accumulated and we have plenty of chopped wood. It's still warm enough at the moment and although we have a lot we will only start using it when absolutely necessary. I'm sure we will collect plenty more on our travels and walks to keep the pile topped up.

Tuesday 3 May 2011

Herbs for Seed

When we think of culinary herbs we think of those with aromatic leaves, like rosemary, basil, thyme and oregano. But there are herbs that concentrate their flavor in their seeds as well. Many cultures make good use of these flavoring seeds in their native cuisine. Caraway seeds add flavour to breads, anise and fennel are good  for sauces and tea, as are coriander seeds and cumin seeds add flavour to curries.

Seeds are usually ground to release flavour before they are added to cooking and will generally add a more intense flavor than leafy herbs. These flavoring seeds are easy to grow - you just need to wait for them to mature and gather them before they decide to reseed themselves but if some self-seed let them as you will have bonus harvests of them year after year.

Anise is an annual, native to Mediterranean and If you decide to grow your own, you will find the seeds much more potent than the commercial stuff found in supermarkets. Plant the seeds in a sunny spot and as the seedlings show, thin them to about 14cm apart. As the seed heads start to turn a gray-brown at the end of the summer, cut most of them and let them dry in a warm spot. The ones you leave will drop seeds for next year's crop. 

Coriander seeds are essential ingredients in curries and sauces. The biggest complaint gardeners have with coriander is that it goes to seed too quickly. By reseeding successive crops, you can have a constant source of the leaves for your salads. Allow the seeds to turn gray or brown before you remove the seed heads. Spread them out to dry thoroughly before you store them.

The poppy is a familiar plant in many gardens, most often springing up from the self-seeding of last year's annual flowers. The seeds contain none of the narcotic that is present in the rest of the plant, and are an important ingredient in baked goods such as breads and cakes.  Scatter seeds and rake them in and most will germinate, so thin the seedlings to about 10cm apart. They are trouble free plants, with gorgeous showy flowers and attractive seed heads that will prolifically scatter seeds if you don't get to them in time.

Cumin seed is widely used in cooking. It is familiar to those who cook Middle Eastern dishes, but not as common in northern countries. The flavor of cumin goes well with chick peas, beans and curries and can also be used in tomato sauces. Growing cumin is more difficult than other seed herbs, since it needs 4 months of warmth to mature. You should start the seeds indoors at least a month before and set the plants out only when the ground has warmed.

If you have never tried growing seed herbs why not try your hand at them this spring. Soon you may just have some of them coming up in odd spots in the garden year after year, an unplanned but bonus harvest.

Sunday 1 May 2011

Gardening in Cyprus - Tasks for May

May begins to feel much warmer as summer is on the way. The sun shines nearly every day and the temperatures average a minimum of around 10c to 20c and a maximum of between 22-28c but there can sometimes be a heatwave with temperatures soaring to 32c. There can still be the odd rainy day, often a heavy thunderstorm, but these don't tend to last more than a couple of hours, after which the sun shines once again. 


Locals still tend to wear long trousers but the sweatshirts are removed for t-shirts. There is plenty to do in the garden to keep gardeners busy during the month.


Plant annuals, perennials and shrubs – including climbers.


Deadhead annuals and perennials to stimulate continuous flowering.


Keep the roots of fruit trees damp to ensure that forming fruit swells


Spray fruit to prevent problems with such things as leaf curl and fruit moths using appropriate organic sprays.


Weed strawberry beds and harvest the fruit as it ripens.


Plant out watermelon and melon plants and if not already done plant out marrows.


Plant out cucumber plants


Cover soft fruits with netting before they ripen – these are the only fruit other than grapes that we lose to birds if not protected.


Prune out lower growth on grape vines.


Plant out tomato plant.


Plant out peanuts (monkey nuts)


Sow leeks


Plant out sunflowers


Sow summer purslane


Sow rocket and salad leaves


Sow onion seeds


Sow butter beans and chickpeas


Happy gardening for the month and if you require any further advice or information go to 
http://sites.google.com/site/cyprusgardener/home