Powered By Blogger

Friday, 5 December 2014

Yacon Harvest

We always like to try something new every year and this year we tried growing yacon (Smallanthus Sonchifolius) a Peruvian white tuber. We planted eight plants. The plants produced 14 Kg of tubers
Some of the tubers were the size of a large sweet potato but most were smaller. They tasted quite nice but not as sweet as we expected given it is used to make a syrup. 
The plant produces two types of underground tubers, ones for eating and small reddish rhizomes used for propagation (propagules). We have retained some propagules for next year but I think we will only grow a couple of plants.

To avoid frost damage to the propagules, we have brushed off all the attached soil and have left a couple of small tubers on to provide water for the propagules. We have stored them covered with shredded newspaper in a shed. We will take them out of storage in early Spring and remove propagules for planting individually into small pots.
So far we have tried the tubers raw in salads and chopped in a stir-fry and curry.  We have tried making them into crisps but think we cut them too thickly. We are yet to try them boiled, steamed or baked.
We have made some syrup but I don't know whether its worth the effort. We food processed 8.5 Kg of tubers and squeezed out the juice. Which was thenboiled and left to simmer for around 5 hours until it became a thickish black syrup. From 8.5 Kg we ended up with 375g of syrup, so to produce any significant amount we would need around 50 Kg of tubers. 
The syrup tastes sweet and very like pekmez made from carob. Overall an easy crop to grow but I don't think we will grow it in any significant amounts.
Given the amount of yacon tubers needed to produce the syrup, I can now understand why it sells for around £10 for 330g. It is being sold as a weight loss aid as a low calorie sugar alternative with lots of other health benefits. I think I would rather eat the tubers.

Tuesday, 4 November 2014

Olive Harvest 2014 and the Drought

We spent yesterday harvesting our olives for processing into olive oil. We have four mature olive trees from which we got a total of 40 Kg and obtained 9 liters of organic extra virgin olive oil.

We had insufficient olives in 2011 or 2012 to take to the olive mill, the harvests were used for cracked or black olives and so we are grateful for even such a small harvest. Luckily we still have some oil left from the 2011 harvest, when the same four tree provided 170 Kg of olives.

Our village has had very little rain since May and even the cacti and figs look in need of  water. The last winter with any significant rainfall was in 2010 and since then we have had only half the average rainfall during the
last three years. Is this climate change or just a cyclical event? Talking to the older members of our community they tell of good winter rain most years and say that three drought years in a row was unheard of. They speak about fields outside the village which had significant numbers of apricot trees which produced good crops almost every year which have all since died.

Lets hope this winter provides significant rainfall, otherwise we will have to start buying olive oil.

Wednesday, 1 October 2014

Carob First Harvest

We have harvested our first carob crop, after planting the tree five years ago. The pods are delicious and will not last that long. The tree is growing quite well so we can expect larger crops in years to come. The pods are legumes and can be used in a variety of ways. Powdered it makes a good flour or after a boiling process it can be turned into the syrup pekmez.

Not only is it a good alternative to chocolate for those of us with a sweet tooth but it contains weight for weight three time the amount of calcium in comparison to milk.

Thursday, 12 June 2014

Thank You

We would just like to say a big thanks to everybody who uses or has used our blog - 100,000 hits is amazing. 

Saturday, 17 May 2014

How to make and use vinegar in the garden - 12 uses

Vinegar making is started by washing either grapes or apples and then extracting their juice. After measuring the volume of juice, strain the juice into a sterilised container, add brewing yeast, sufficient for the volume of juice used and insert an airlock.
The juice is left  to ferment and turn the fruit sugar into alcohol. Once fermentation is completed, expose the liquid to the air which will permit acid making bacteria to convert the alcohol to vinegar. This process can be speeded by adding half a cup of organic vinegar to the liquid.

Whilst the process is taking place a cheesecloth over the container to keep out insects or dirt. The liquid needs to be kept at between 15c and 25c and stirred daily during fermentation which takes between 3-4 weeks.

Your vinegar is ready when it smells and tastes like vinegar. Once fermentation is complete, strain the liquid through a cheesecloth several times to remove any remaining yeast  and stop the fermentation process. To permit long term storage your vinegar must be pasteurised by heating to 75c, use a cooking thermometer to determine the temperature, for about 10 minutes.  Pour your vinegar whilst still hot into sterilised glass bottles and store out of direct sunlight in a cool area. 

If your vinegar tastes too strong it can be diluted with water.

Once you have a batch of vinegar the number of uses are many. Listed are ten of our gardening favourites.

1.  Use full strength vinegar to kill weeds and grass on paths and other hard to reach areas.
2.  Deter ants by spaying vinegar on their trails or ant hills.
3.  Soothe bee or other bites by rubbing vinegar on affected areas.
4.  Cleans any bugs off of freshly picked vegetables by adding vinegar and salt to a bowl of water.
5.  Use diluted vinegar to clean glass.
6.  Get rid of any rust on garden tools by soaking overnight in vinegar.
7.  Remove any vegetable or fruit stains on your hands by rubbing with vinegar
8.  Drown fruit flies by placing a cup of vinegar in a jar (see image) and add a couple of drops of washing-up liquid.
9. Add 1 tablespoon of vinegar and 1 teaspoon of sugar to cut flowers in a vase to help preserve them for longer.
10. Kill slugs by spraying with vinegar 
11. Kill snails squirting with a solution of half vinegar and half water.
12. Make your own organic weedkiller http://cyprusgardener.blogspot.co.uk/2012/01/make-your-own-organic-weedkiller.html

Friday, 25 April 2014

Green Almonds - another Superfood?

Almonds have been described as a Superfood. A label which given to any food considered especially nutritious or in some way of benefit to our health.

I would be the first to admit that I have always been put off by such descriptions and we have always thought that eating a balanced diet which includes lots of fruit and vegetables and which avoids too much sugar, salt and saturated fat is all we needed. But if you investigate these foods it would be silly to ignore the extra nutritional and health benefits they can provide. 

Apparently green almonds are now being promoted as a new Superfood. We have three almond trees and at this time of the year, for about an 6-8 week period, green almonds are available. The unripe whole almond which is soft, has a fuzzy green skin and the nut, at a very early stage, in the centre are eaten all over the Island and have been so for centuries. 

Scientific studies have revealed these nuts have a very high nutritional value, loaded with healthy fats, minerals, vitamins, proteins and antioxidants. And added to which almonds are one of the lowest calorific nuts and have more calcium contents than any other nut. So maybe they are a Superfood. Not only do almonds lower bad cholesterol levels in the body but they can reduce and protect against the risk of heart diseases. 

The almond, is native to the Mediterranean, and by far the most popular nut tree grown in Cyprus and its beautiful blossom can be seen all over the island in January. To enjoy almonds, you will need to plant at least two almonds for cross-pollination for nut production.  

A great way of enjoying green almonds is to lightly fry a handful for a snack. Wash and trim the tops and bottoms, cut in half and fry for a few minutes (turning occasionally) or so in olive oil. Add salt and lemon juice to further enhance the flavour. 

Saturday, 19 April 2014

Quick fizzy citrus drink

Lemons, oranges, grapefruits and limes are all in season at the moment. This recipe is a quick and easy way of producing a refreshing and vitamin packed drink. 

Wash and chop one fruit or a combination of citruses and place in a blender with enough water to blend until smooth..

Strain into a jug and top up with sparkling water. Enjoy as it is or mix in honey to sweeten to taste,

Sunday, 6 April 2014

Reduce food costs - Grow your own frugally

Growing your own food organically will not only provide you with healthier food but will significantly reduce your ever growing food bill. But it's easy to get carried away when starting out growing some of your own vegetables, herbs and fruit and purchase expensive gadgets, tools, equipment and spend large amounts of money at garden centres. But there are alternatives and the following tips will hopefully go some way towards keeping the cost of growing your own produce to a minimum.
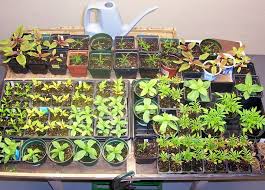
Start your plants from seed - Buying packets of seeds is relatively cheap in comparison to buying plants. Keep an eye out for end of season sales when most seed merchants reduce their prices. There are usually too many seeds in a packet to use, so consider swapping some of your seeds with gardening friends or join an exchange club which is a good way of halving the cost of your seeds. Once plants are growing, try saving your own seeds and you will have plenty of seeds for yourself, to swap or share with friends. You can even remove seeds, and successfully germinate them. from supermarket produce. This can save money on some expensive seeds such as cherry tomatoes and peppers. Don't throw out seeds just because the expiry date has gone, the germination rate will reduce but you may still get a 50% success rate from seeds where the expiry date is up to two years. After four years past the expiry date most seeds are no longer viable.

Keep some of your harvest for re-planting the following season, this works well with potatoes, Jerusalem artichokes, yacon and garlic. You can also plant out any potatoes or garlic that have sprouted before use.  
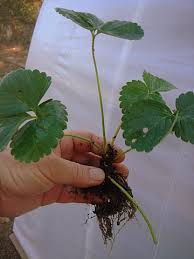
Multiply your plants - By propagating and dividing plants, you can make more plants. Most plants can be propagated by one method or another and these can also be swapped with friends, allowing you to obtain plants you don't have and these can themselves, once established, can be multiplied into yet more plants. There are various methods of propagation and the choice of method is dependant on the plant. Always choose a healthy plant for propagating and research the appropriate method for the plant to be propagated before proceeding. Even with care, only between 60% to 70% of propagations will succeed. Before proceeding, you will need a sharp pair of secateurs, pots, rooting compost and rooting hormone. Always ensure your equipment has been thoroughly cleaned before re-use. 

Temperature control is a very important factor in ensuring successful propagation. The ideal temperature for most cuttings is between 10C and 21C. The easiest way to ensure a constant temperature is by using an electric propagator which will re-pay the initial outlay very quickly in producing new plants and also allow you a head start in seed germination.  

It is also important to ensure moisture is controlled by either placing and securing a plastic bag over the pot, by propagating cuttings in water or by regularly spraying cuttings placed in an electric propagator. 

Cuttings can be taken from softwood or hardwood depending on the plant to be propagated. Most perennials are propagated from softwood cuttings in the spring or summer. Always select new growth for cuttings and ensure the stem has not flowered or fruited. Take a 10cm to 20cm cutting just below a leaf joint  which has at least two leaf joints and insert half your cutting, after dipping in rooting hormone, into your rooting compost. Tomatoes can be multiplied by taking cuttings as stems readily root. 

Many fruit trees and bushes and vines, such as blackcurrants and grapes, are propagated from hardwood cuttings in the autumn or winter. Take 15cm to 45cm cuttings from new growth which has not fruited or flowered and with at least two leaf joints. These can be rooted directly in the ground or in containers outside, after brushing the tip with rooting compound, and will root, depending on the parent, in between two and twelve months. 

Bud cuttings are used for plants with long stems. such as grape vines. Remove a section of stem between two leaves and insert, after dipping in rooting compound, below a bud into your rooting compost. Alternatively, take 8cm cuttings with a bud in the centre. Remove a slither of wood on the opposite side to the bud and insert horizontally into a mixture of sand and peat with the cut edge downwards. Just cover the cuttings, place in a propagator and germination usually occurs within 2-4 weeks. Pot-up the plants once leaves appear and once established plant out.

For plants consisting mainly of leaves, with very few or no stems such as the prickly pear, leaf cuttings may be used for propagation. Cut off a fully mature leaf and cut sections of 2.5cm across the leaf and, after dipping in rooting compound, insert upright halfway into rooting compost. 

Root cuttings are used to propagate some trees, shrubs and herbaceous perennials such as the passion flower. Expose the roots and take cuttings of 2.5cm to 7.5cm from roots which are at least 0.6cm thick. Cut flatly at the top of the root and diagonally at the bottom end, the cutting should be fully inserted into the rooting compost with the diagonal end first. 

Plants such as strawberries and globe artichokes can be propagated by planting off-shoots. Strawberry offshoots can be placed into pots and cut away from the parent once established. Globe artichoke offshoots can be detached carefully from the parent, replanted and kept well watered until established.
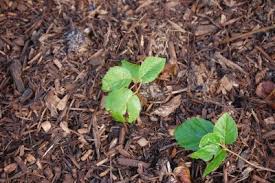
Layering can be used for plants such as rosemary, jasmine and fruiting bushes such as kiwi and blackberry. Bury the tips of stems and after a period roots will develop on the buried tip and the new plant can be detached from the parent. 

Removing suckers, from figs and raspberries for example, is another propagation method. Carefully expose the base of the sucker and cut as close as possible to the parent. Plant as soon as possible after removal and keep well watered until established. 

Division is a further method of propagation and can be used for plants such as lemongrass and comfrey. Use two spades to split established plants down the middle and replant. 

Free Containers - Do not throw out containers such as milk or juice cartons, cardboard egg boxes or toilet rolls. These can all be re-used for sowing seeds. Toilet rolls are good for raising peas, beans and even beetroot, which does not like being transplanted, just fill the toilet roll with compost and when the seedlings are strong enough plant out. The toilet roll will help retain moisture and eventually rot away. Cut off the tops of cartons, wash out and cut drainage holes in the bottom to use as pots. The bottom section of egg boxes can be filled with compost and used to raise seedlings. Like toilet rolls, these can be cut apart and planted into the soil where they will rot down. You can even try making your own pots from newspapers by rolling round a cylinder and folding  into the base to secure. 

Manure, compost and mulch - To keep your gardening costs down, make your own compost, obtain manure from friendly farmers of livestock keepers and use a variety of materials for mulching. Mulches can be made from shredded newspapers, seaweed, coffee grounds, hay, leaves, sawdust, wood shavings and black plastic.    

Organic Pest Control - Don't rush out to buy expensive organically safe products when pests or diseases appear or to kill weeds, firstly try and make your own. There are lots of recipes available on the internet. As a start try using lemon juice and vinegar as a weedkiller by following this link http://cyprusgardener.blogspot.com/2013/02/homemade-organic-weedkiller.html

Monday, 3 March 2014

Yacon Syrup - A healthy homemade sugar alternative

We are always on the lookout for new vegetables to try and have been researching into Yacon (Smallanthus Sonchifolius) a South-American perennial white tuber. The tuber has the added benefit that it can be turned into a syrup which is a healthy alternative to sugar. A syrup which is glucose free and does not increase blood sugar levels.

Thanks to a kind donation we have planted some propagules on 13th February and they are growing well.

The tuber looks like a baking potato but apparently tastes more like a cross between apple and celery. Its high liquid content means it can be used to make a syrup. The tubers are a close relative of sunflowers and Jerusalem artichokes and grow up to 2 metres tall with yellow flowers.

The plant produces two types of underground tubers, small reddish rhizomes used for propagation (propagules) and large brown tubers for eating. The larger ones can weigh anything between 300 grams and a kilogram. Apparently any rhizomes left in the ground, in non-frosting areas, will re-emerge in the Spring. For frosting areas, brush off any soil and leave a couple of small tubers on kept tubers which will provide water for the propagules. Store in dryish compost with a perforated lid to avoid condensation in a warm area. Take out of storage in early Spring and remove propagules for planting individually into small pots. Grow on as needed until its time to plant them out.

Plant in loosened soil at 3 cm deep and about 100 cm apart. They do not appear to be too fussy and will apparently thrive in most soils but prefer a soil rich in organic matter. Mulch deeply and the plant will grow through the mulching. Has moderate water needs and needs to be kept moist rather than soggy. The plants reach maturity after about 6 months and are harvested after the flowers and stems die back. Apparently drying the tubers in the sun for up to 2 weeks will sweeten them.

The tubers can be enjoyed raw or juiced but can also be boiled, steamed or baked. Strips can also be sun dried to produce a sweet crunchy snack. However enjoyed the tubers have the added benefit of being high in fibre but low in calories.

Making Yacon syrup is a simple process. Twelve kilograms of tubers will make about one litre of syrup. Thoroughly was the tubers to remove all soil, peel, chop and blend in a food processor. Squeeze the pulp into a bowl to separate the juice and add the pulp to your compost. Put the juice into a large preserving pan and heat gently, removing any scum that floats on top. Continue heating for quite a few hours, stirring quite often, until the juice through evaporation reduces to a syrup. This may need to be done over a couple of days to get a thick syrup. The last step is to pour the syrup through a fine sieve, the thicker syrup left behind can be used as a sweetener in recipes requiring sugar. The fine syrup can be stored in a pre-sterilised jar in the fridge. Where it will keep for a year until your next yacon crop is ready.